The Illustrated Instructions
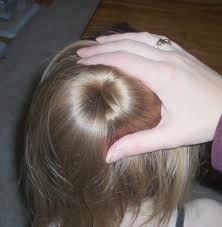
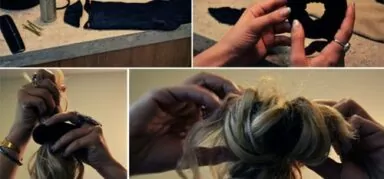
As you know the first step is to cut a hole in the toe of a tube sock then role it like you would roll a long shirt sleeve. The end result should resemble a doughnut. After you pull your hair up into a pony tail (where you would like the center of your bun to be) pull your hair through the center of the sock.
Next you should spread your hair over the sock bun (Make sure to cover all of the sock otherwise you’ll be able to see the material and you will get weird questions like : Do you normally put footwear in your hair?)
Thirdly, place a rubber band over the bun and secure the dangling left-over hair with bobby pins, wrapping your hair around the base of the bun.
A Second Solution
A few of you said you tried this, but your hair was too long to bobby pin it around the bun. There is a quick solution to this. Prepare the bun like you normally would; however, instead of pinning the loose hair with bobby pins let it hang straight down your back.
Braid your hair into one braid (normal or fishtail braid will work for this). Once your done with the braid wrap that around the base of your bun. The end result should look like this:
What Do You Think?
Have you tried out this hairstyle? Will you? Leave us a comment and let us know what you think!








I need one for curly hair please! Issues are being had
Oooh! It’s perfect. Thank you.
Though, I did it a little differently.. I have long hair, but instead of braiding it, and wrapping it around the bun; I twisted it and wrapped it around the bun, then just secured the end with a bobby-pin. :)
It’s perfect for me; so easy and it holds great! I can shake my head like a rocker and it doesn’t come undone. Lol!
Thanks again. This helps ALOT! ^w^
I have medium length hair and I tried this out today and it worked great, it looks so cute and it’s so easy!!! thanks for coming up with this idea.
Can you show a picture of how your hair should lay before you braid it? I’m not sure how it’s suppose to look. Thank you!
I’m in JROTC too but they never taught us how to do this. I’ll definitely attempt this but I have a ton and a half of layers so we’ll see if it works xD
I have middle length hair, but its really really thin, so i used a hairpiece/hair extentions and then tried this out, and it looked great! i love it so much, thank you! xxx
I am on the drill team in JROTC. This is how we prepare our hair before a drill competition. So ladies, trust me, your hair won’t fall down if done right. :) oh and the braid does add some cuteness to it; the smaller the more hair you’ll have to make the braid btw
OMG! My little niece who’s eight always has this done in her hair but i never knew how to do it! I always thought that looks so complicated! But now I know! Can’t wait to try it out! Thanks for the help!
Kudos! What a neat way of thkniing about it.
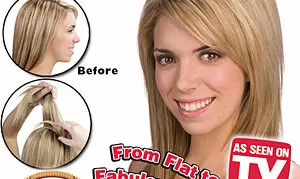
Oh, that’s so cool! There’s a Taiwanese product which does something similar, but this is a great DIY alternative.
Let us know how it goes, Aleida! We’d love to see pictures of it in the forum if you’re successfull :)
I’ve never heard of anyone making buns this way. Maybe I’ll try it and see how my butt-length hair monster reacts.